Listen up, tech enthusiasts! If you're diving into the world of Raspberry Pi, one of the coolest things you can do is access it remotely using SSH. Yep, you heard that right—SSH (Secure Shell) lets you control your Pi from anywhere in the world. Whether you're a beginner or a seasoned pro, this guide will walk you through everything you need to know about accessing Raspberry Pi SSH remotely. So buckle up and let's get started!
Picture this: you're at work or on vacation, but you need to tweak something on your Raspberry Pi back home. Sounds stressful, right? Not anymore! With SSH, you can remotely connect to your Pi and manage it as if you're sitting right in front of it. This isn't just convenient; it's downright essential for anyone serious about managing their Pi projects efficiently.
But hold up! Before we dive deep, let me remind you that security is key here. You don't want random strangers poking around in your Pi, so we'll cover some tips to keep your setup safe and secure. Now, let's break it down step by step so you can master this skill like a boss.
Read also:Why Librarian From Monsters Inc Is The Unsung Hero Of Monstropolis
Why Accessing Raspberry Pi SSH Remotely Matters
First things first—why should you even bother with remote SSH access? Well, my friend, there are plenty of reasons. For starters, it saves you time and effort. Instead of physically accessing your Pi every time you need to make changes, you can do it from the comfort of your couch—or anywhere else with an internet connection. Plus, it opens up endless possibilities for automating tasks and managing projects remotely.
Here’s a quick rundown of why accessing Raspberry Pi SSH remotely is such a game-changer:
- Convenient for managing headless setups (no monitor or keyboard needed).
- Perfect for automating scripts and monitoring systems.
- Secure way to control your Pi from anywhere in the world.
- Helps in troubleshooting issues without being physically present.
So, whether you're running a home server, setting up a media center, or building a smart home system, remote SSH access is a must-have skill. Let's move on to the next step and see how it works.
Setting Up SSH on Your Raspberry Pi
Alright, let's get our hands dirty! The first step is enabling SSH on your Raspberry Pi. Don't worry—it's super easy. Here's what you need to do:
Step 1: Enable SSH on Raspberry Pi OS
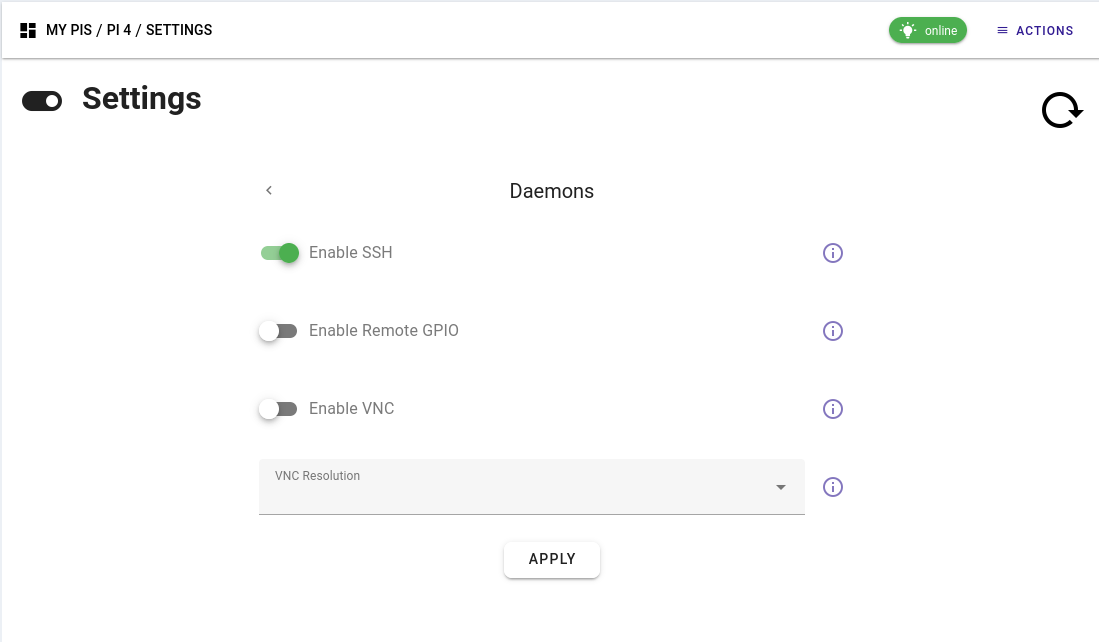
To enable SSH, you have two options. The first one is through the graphical interface, and the second is via the terminal. If you're using Raspberry Pi OS with desktop, here's how you do it:
- Go to the top-right corner of your screen and click on the gear icon.
- Select "Preferences" and then "Raspberry Pi Configuration."
- Click on the "Interfaces" tab.
- Set SSH to "Enabled" and hit OK.
If you're a terminal wizard, you can enable SSH by typing:
Read also:Camilla Arauacutejo Height The Untold Story Behind The Rising Star
sudo raspi-config
Then navigate to "Interfacing Options"> "SSH"> "Enable." Easy peasy, right?
Step 2: Find Your Pi's IP Address
Once SSH is enabled, you need to find your Pi's local IP address. This is crucial because you'll use it to connect remotely. To find the IP address, simply type:
ifconfig
Look for the "inet" address under the "wlan0" or "eth0" section. That's your Pi's local IP. Keep it handy—we'll need it later.
Connecting to Your Raspberry Pi Locally
Before we jump into remote access, let's test things locally. This will help you ensure everything is set up correctly. Here's how you connect to your Pi using SSH from another computer on the same network:
Using PuTTY on Windows
For Windows users, PuTTY is the go-to tool for SSH connections. Download it from the official site, fire it up, and follow these steps:
- Enter your Pi's IP address in the "Host Name" field.
- Set the port to 22 (default for SSH).
- Click "Open" and log in using your Pi's username and password.
Voila! You're now connected to your Pi. If you're using macOS or Linux, you can simply open the terminal and type:
ssh pi@your-pi-ip
Replace "your-pi-ip" with your Pi's actual IP address. Enter the password when prompted, and you're good to go!
Accessing Raspberry Pi SSH Remotely
Now comes the exciting part—accessing your Pi from anywhere in the world. But hold your horses! Before we proceed, let's talk about security. Exposing your Pi to the internet comes with risks, so we'll cover some best practices to keep your setup safe.
Option 1: Using Port Forwarding
Port forwarding is one of the most common methods for remote SSH access. It involves forwarding a specific port on your router to your Pi's local IP address. Here's how you do it:
- Log in to your router's admin panel (usually via 192.168.0.1).
- Find the "Port Forwarding" or "Virtual Servers" section.
- Add a new rule with the following details:
- Service Name: SSH
- External Port: 22 (or any custom port you prefer)
- Internal IP: Your Pi's local IP address
- Internal Port: 22
- Save the settings and restart your router.
Once port forwarding is set up, you can connect to your Pi using your public IP address. But wait—how do you find your public IP? Easy! Just Google "What is my IP" and there you go.
Option 2: Using a Dynamic DNS Service
Public IP addresses can change, which makes remote access tricky. That's where Dynamic DNS (DDNS) services come in handy. They assign a static domain name to your changing IP address, making it easier to connect. Some popular DDNS services include No-IP and DuckDNS.
Here's how to set it up:
- Create an account on a DDNS service of your choice.
- Register a domain name and link it to your public IP.
- Install the DDNS client on your Pi to keep the domain updated.
Now you can connect to your Pi using the domain name instead of the IP address. Much simpler, right?
Securing Your Raspberry Pi SSH Connection
Security should always be a top priority when accessing your Pi remotely. Here are some tips to keep your setup safe:
Change the Default SSH Port
Changing the default SSH port (22) is a simple yet effective way to deter hackers. To do this, edit the SSH config file:
sudo nano /etc/ssh/sshd_config
Find the line that says "Port 22" and change it to a custom port number (e.g., 2222). Restart the SSH service for the changes to take effect:
sudo systemctl restart ssh
Disable Password Authentication
Passwords can be guessed or brute-forced, so it's better to use SSH keys for authentication. Here's how:
- Generate an SSH key pair on your local machine:
- Windows: Use PuTTYgen.
- macOS/Linux: Type "ssh-keygen" in the terminal.
- Copy the public key to your Pi:
- Windows: Use Pageant (part of PuTTY).
- macOS/Linux: Type "ssh-copy-id pi@your-pi-ip".
- Disable password authentication in the SSH config file:
- Edit /etc/ssh/sshd_config.
- Set "PasswordAuthentication no".
With SSH keys in place, even if someone gets your Pi's IP, they won't be able to log in without the private key.
Advanced Tips for Remote SSH Access
Now that you've got the basics down, let's level up your skills with some advanced tips:
Use SSH Tunnels for Secure Connections
SSH tunnels encrypt your data, making it harder for hackers to intercept. You can use them to securely access services running on your Pi, like a web server or database. Here's how:
ssh -L local_port:destination_host:destination_port pi@your-pi-ip
For example, to access a web server running on port 80 on your Pi:
ssh -L 8080:localhost:80 pi@your-pi-ip
Now you can visit http://localhost:8080 in your browser to access the web server.
Set Up SSH Over TOR for Ultimate Privacy
If you're really paranoid about privacy, you can set up SSH over the TOR network. This hides your IP address and makes it nearly impossible for anyone to trace your connection. Just install the TOR package on your Pi and configure SSH to listen on the TOR port.
Keep in mind that TOR can slow down your connection, so use it only if you need maximum anonymity.
Troubleshooting Common SSH Issues
Even with the best setup, things can go wrong sometimes. Here are some common SSH issues and how to fix them:
Connection Refused
If you get a "Connection refused" error, it usually means SSH isn't running or the port is blocked. Check the following:
- Make sure SSH is enabled on your Pi.
- Verify that the port is open on your router.
- Ensure your firewall isn't blocking the connection.
Permission Denied (Public Key)
This error occurs when SSH keys aren't set up correctly. Double-check the following:
- Make sure your public key is added to ~/.ssh/authorized_keys on your Pi.
- Ensure the file permissions are correct (chmod 600 authorized_keys).
- Check that password authentication is disabled in the SSH config file.
Conclusion and Next Steps
And there you have it—a comprehensive guide to accessing Raspberry Pi SSH remotely. Whether you're a beginner or a seasoned pro, mastering SSH will take your Pi projects to the next level. Remember, security is key, so always follow best practices to protect your setup.
Now it's your turn! Try setting up remote SSH access on your Pi and let me know how it goes. If you have any questions or run into issues, feel free to leave a comment below. And don't forget to share this article with your fellow Pi enthusiasts—it might just save them a headache or two!
Stay tuned for more awesome Raspberry Pi tutorials. Until next time, happy tinkering!
Table of Contents
- Why Accessing Raspberry Pi SSH Remotely Matters
- Setting Up SSH on Your Raspberry Pi
- Connecting to Your Raspberry Pi Locally
- Accessing Raspberry Pi SSH Remotely
- Securing Your Raspberry Pi SSH Connection
- Advanced Tips for Remote SSH Access
- Troubleshooting Common SSH Issues
- Conclusion and Next Steps