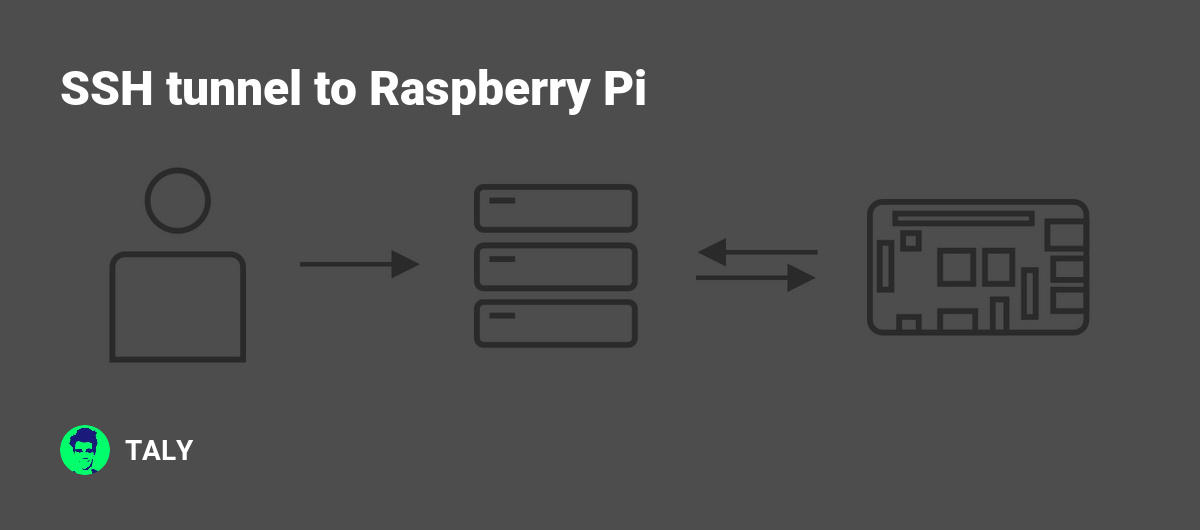
Are you tired of dealing with insecure connections or worried about hackers sniffing your data? Enter Raspberry Pi SSH tunnel – the ultimate solution for creating secure communication channels! If you’ve ever wondered how to set up a Raspberry Pi SSH tunnel or why it’s so important, you’re in the right place. Let’s dive into the world of SSH tunnels and learn how to protect your data like a pro.
Nowadays, cybersecurity is more important than ever. Whether you're accessing a remote server or sharing sensitive information, having a secure connection is crucial. That’s where Raspberry Pi SSH tunnel comes in handy. With its flexibility and affordability, this little device can become your go-to tool for secure communication.
This guide will walk you through everything you need to know about Raspberry Pi SSH tunneling. From setting up your Raspberry Pi to configuring SSH tunnels, we’ll cover it all. So, grab a coffee, sit back, and let’s get started!
Read also:Kannada 2024 A Deep Dive Into The Future Of South Indian Cinema
Table of Contents
- What is SSH Tunnel?
- Raspberry Pi Overview
- Why Use SSH Tunnel?
- Setting Up Raspberry Pi
- Configuring SSH on Raspberry Pi
- Creating an SSH Tunnel
- Common Issues and Troubleshooting
- Advanced Techniques for SSH Tunneling
- Security Tips for Raspberry Pi SSH Tunnel
- Conclusion
What is SSH Tunnel?
SSH tunnel, short for Secure Shell tunnel, is like a secret passageway for your data. It allows you to create a secure connection between two devices over an unsecured network, such as the internet. Think of it as a private tunnel that encrypts all your data, making it invisible to prying eyes.
When you use an SSH tunnel, your data travels through this encrypted channel, ensuring that no one can intercept or tamper with it. This is particularly useful when accessing remote servers, transferring files, or even browsing the web securely.
Now, when you combine SSH tunneling with a Raspberry Pi, you’ve got yourself a powerful tool for secure communication. Let’s explore why this combination is so awesome!
Raspberry Pi Overview
Raspberry Pi is like the Swiss Army knife of the tech world. It’s a tiny, affordable computer that can do just about anything – from running a media center to acting as a web server. And guess what? It’s also perfect for setting up SSH tunnels!
Raspberry Pi Features
Here are some of the key features that make Raspberry Pi ideal for SSH tunneling:
- Low cost: You don’t need to break the bank to get started.
- Compact size: It fits anywhere, making it perfect for portable setups.
- Energy-efficient: Uses minimal power, so it’s great for long-term use.
- Open-source: Fully customizable and compatible with tons of software.
Whether you’re a tech enthusiast or just starting out, Raspberry Pi is a fantastic platform for learning and experimenting with SSH tunnels.
Read also:Chris Isaak Illness The Untold Story Behind The Legend
Why Use SSH Tunnel?
So, why bother with SSH tunneling in the first place? Well, there are plenty of good reasons. Here are a few:
1. Enhanced Security
SSH tunnels encrypt your data, making it nearly impossible for hackers to intercept or decipher. This is especially important when accessing sensitive information or working on public Wi-Fi networks.
2. Bypass Restrictions
SSH tunnels can help you bypass geographic restrictions or firewalls. For example, if you’re traveling and need to access a blocked website, an SSH tunnel can come to the rescue.
3. Remote Access
With SSH tunneling, you can securely access remote servers or devices from anywhere in the world. This is perfect for managing servers, transferring files, or monitoring systems.
Now that you know why SSH tunneling is so awesome, let’s see how to set it up on your Raspberry Pi!
Setting Up Raspberry Pi
Setting up your Raspberry Pi is super easy. Follow these steps to get started:
Step 1: Get the Hardware
First, you’ll need a Raspberry Pi board, a microSD card, and a power supply. You can pick these up from any tech store or online retailer.
Step 2: Install the Operating System
Download the Raspberry Pi OS from the official website and flash it onto your microSD card using a tool like Balena Etcher. Once done, insert the card into your Raspberry Pi and boot it up.
Step 3: Connect to Wi-Fi
During the initial setup, you’ll be prompted to connect to your Wi-Fi network. Make sure to choose a secure network for the best results.
With your Raspberry Pi up and running, it’s time to configure SSH!
Configuring SSH on Raspberry Pi
SSH (Secure Shell) is already installed on Raspberry Pi OS, but you need to enable it. Here’s how:
Method 1: Using the Raspberry Pi Configuration Tool
Open the terminal and type:
sudo raspi-config
Navigate to “Interfacing Options,” then select “SSH.” Choose “Yes” to enable SSH and that’s it!
Method 2: Using the Command Line
If you prefer the command line, you can enable SSH by running:
sudo systemctl enable ssh
sudo systemctl start ssh
Now that SSH is enabled, you’re ready to create your tunnel!
Creating an SSH Tunnel
Creating an SSH tunnel is easier than you might think. Here’s a step-by-step guide:
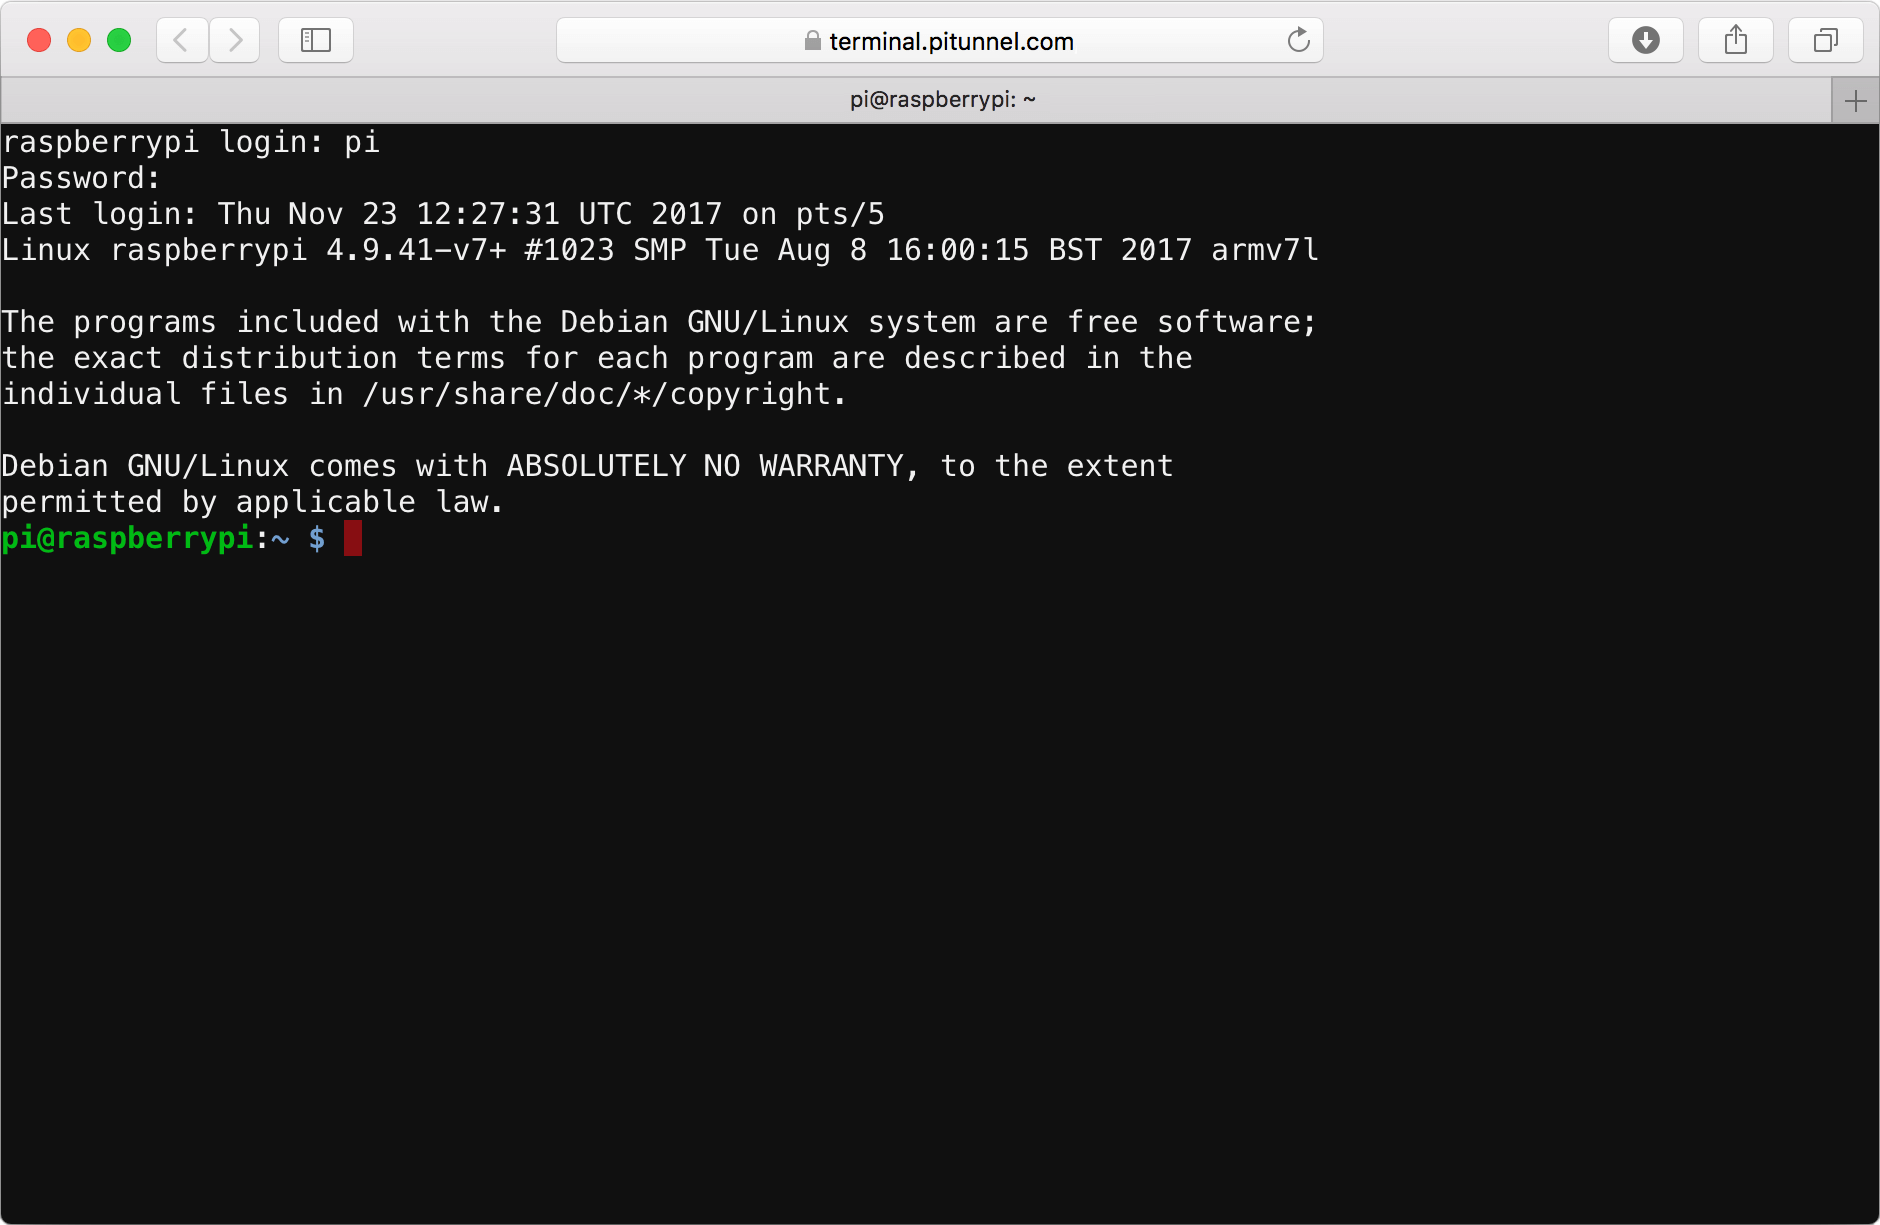
Step 1: Open Terminal
Whether you’re using your Raspberry Pi directly or accessing it remotely, open the terminal to start the process.
Step 2: Enter the SSH Command
The basic syntax for creating an SSH tunnel is:
ssh -L [local_port]:[destination_host]:[destination_port] [user]@[ssh_server]
For example, to tunnel traffic from your local machine’s port 8080 to a remote server’s port 80, you’d use:
ssh -L 8080:localhost:80 pi@raspberrypi.local
Step 3: Verify the Connection
Once the tunnel is established, you can test it by accessing the destination service through your local port. For instance, if you tunneled a web server, open your browser and navigate to http://localhost:8080.
And just like that, you’ve got yourself a secure SSH tunnel!
Common Issues and Troubleshooting
Even the best setups can run into problems. Here are some common issues and how to fix them:
Issue 1: SSH Not Working
If SSH isn’t working, double-check that it’s enabled on your Raspberry Pi. Also, ensure that your firewall isn’t blocking the SSH port (default is 22).
Issue 2: Connection Timeout
A connection timeout usually means there’s a network issue. Verify your Wi-Fi connection and make sure your Raspberry Pi is reachable from your local network.
Issue 3: Authentication Failed
If you’re getting an authentication error, check your SSH credentials. Make sure you’re using the correct username and password for your Raspberry Pi.
By addressing these issues, you can ensure a smooth SSH tunneling experience.
Advanced Techniques for SSH Tunneling
Once you’ve mastered the basics, it’s time to level up your SSH tunneling skills. Here are a few advanced techniques:
Dynamic Port Forwarding
Dynamic port forwarding turns your SSH connection into a SOCKS proxy. This allows you to route all your internet traffic through the tunnel, providing an extra layer of security.
SSH Key Authentication
Instead of using passwords, you can set up SSH key authentication for a more secure login process. This involves generating public and private keys on your local machine and copying the public key to your Raspberry Pi.
SSH Tunnels with Docker
For those working with containers, you can set up SSH tunnels within Docker to securely access services running inside containers.
These advanced techniques can take your SSH tunneling game to the next level!
Security Tips for Raspberry Pi SSH Tunnel
While SSH tunnels are secure by default, there are a few extra steps you can take to enhance your security:
- Use strong passwords or SSH keys for authentication.
- Change the default SSH port to something less common.
- Enable two-factor authentication for added protection.
- Regularly update your Raspberry Pi OS and software to patch vulnerabilities.
By following these tips, you can ensure that your SSH tunnel remains secure and reliable.
Conclusion
Raspberry Pi SSH tunneling is a powerful tool for secure communication. Whether you’re accessing remote servers, bypassing restrictions, or simply protecting your data, this setup has got you covered.
In this guide, we’ve covered everything from setting up your Raspberry Pi to creating SSH tunnels and troubleshooting common issues. By following these steps, you can harness the full potential of SSH tunneling and keep your data safe from prying eyes.
So, what are you waiting for? Dive into the world of Raspberry Pi SSH tunneling and take your cybersecurity to the next level. And don’t forget to share your experiences in the comments below or check out our other articles for more tech tips!