Hey there, tech enthusiasts! If you're reading this, chances are you're one of those people who loves tinkering with gadgets, automating stuff, or just plain old experimenting with technology. Well, let me tell ya, controlling a Raspberry Pi remotely is like giving your little computer superhero powers. Imagine being able to access your Raspberry Pi from anywhere in the world—whether you're at home, at work, or even on vacation! That's the kind of futuristic magic we're about to dive into today. So buckle up, because we’re going deep into the world of remote Raspberry Pi control.
Now, before we get all giddy and start diving into the nitty-gritty details, let's clear the air about why this matters. The ability to control a Raspberry Pi remotely isn't just a cool party trick—it's an essential skill for anyone working on IoT projects, home automation systems, or even just managing a headless Raspberry Pi. Whether you're setting up a weather station, running a media server, or monitoring your home security system, remote access makes everything smoother and more efficient.
So, here's the deal: we’re gonna break down everything you need to know about how to control a Raspberry Pi remotely from anywhere in the world. We’ll cover the basics, the tools you’ll need, the setup process, troubleshooting tips, and even some advanced techniques for those of you who want to take things to the next level. Stick around, because by the end of this, you’ll be a Raspberry Pi remote control pro!
Read also:Cat Tiff The Ultimate Guide To Understanding And Loving These Stunning Felines
Table of Contents
- What is a Raspberry Pi?
- Why Control a Raspberry Pi Remotely?
- Tools You’ll Need
- Basic Setup for Remote Access
- Using SSH for Remote Access
- Advanced Methods for Remote Control
- Security Considerations
- Troubleshooting Tips
- Real-World Applications
- Conclusion
What is a Raspberry Pi?
Let’s start with the basics, shall we? A Raspberry Pi is basically a tiny, affordable computer that can do all sorts of amazing things. It’s like having a full-fledged desktop computer, but smaller, cheaper, and way more versatile. People use Raspberry Pis for everything from building robots to creating media centers, setting up home automation systems, and even running web servers.
But why would you want to control it remotely? Well, imagine this: you’ve set up a Raspberry Pi as a weather station in your backyard, but you’re out of town for a week. With remote access, you can still check the data, update the software, or troubleshoot any issues without needing to physically touch the device. Or maybe you’ve got a Raspberry Pi running a media server at home, and you want to stream your favorite movies while you’re chilling at a coffee shop. Remote control makes all of this possible.
Key Features of Raspberry Pi
- Compact size
- Affordable price
- Highly customizable
- Supports Linux-based operating systems
- Perfect for IoT and automation projects
Why Control a Raspberry Pi Remotely?
Here’s the thing: controlling a Raspberry Pi remotely isn’t just about convenience—it’s about unlocking the full potential of your device. Whether you’re managing a server, monitoring sensors, or automating tasks, remote access gives you the flexibility to interact with your Raspberry Pi from anywhere, anytime. Here are a few reasons why you might want to control your Raspberry Pi remotely:
- Headless Operation: If your Raspberry Pi doesn’t have a monitor, keyboard, or mouse connected, remote access is your only option.
- Remote Monitoring: Need to keep an eye on your weather station, security cameras, or other IoT devices? Remote control lets you do that from anywhere.
- Automation: Automating tasks becomes a breeze when you can access your Raspberry Pi remotely to tweak scripts or update configurations.
- Flexibility: Whether you’re at work, traveling, or just lounging on the couch, remote access allows you to interact with your Raspberry Pi without being tied to a specific location.
Tools You’ll Need
Alright, so you’re convinced that controlling a Raspberry Pi remotely is the way to go. But what do you actually need to make it happen? Here’s a quick rundown of the tools and software you’ll need:
- Raspberry Pi: Duh! You’ll obviously need a Raspberry Pi to get started. Any model will work, but newer models like the Raspberry Pi 4 have better performance and connectivity options.
- Power Supply: Make sure your Raspberry Pi is powered up and connected to a stable power source.
- Network Connection: Your Raspberry Pi needs to be connected to the internet, either via Wi-Fi or Ethernet.
- SSH Client: This is the tool you’ll use to connect to your Raspberry Pi remotely. On Windows, you can use PuTTY or Windows Terminal. On macOS and Linux, you can use the built-in Terminal app.
- Static IP Address: Assigning a static IP address to your Raspberry Pi makes it easier to connect to it consistently.
- Port Forwarding: If you want to access your Raspberry Pi from outside your local network, you’ll need to set up port forwarding on your router.
Basic Setup for Remote Access
Before we dive into the more advanced methods, let’s cover the basic setup process. This is where you’ll get your Raspberry Pi ready for remote access. Follow these steps:
Step 1: Enable SSH
SSH (Secure Shell) is the most common method for accessing a Raspberry Pi remotely. To enable SSH, follow these steps:
Read also:Unveiling The Extraordinary Journey Of Jason Mesnick
- Boot up your Raspberry Pi and log in to the desktop environment.
- Open the Raspberry Pi Configuration tool by typing
sudo raspi-configin the terminal. - Go to the Interfacing Options menu and enable SSH.
- Reboot your Raspberry Pi to apply the changes.
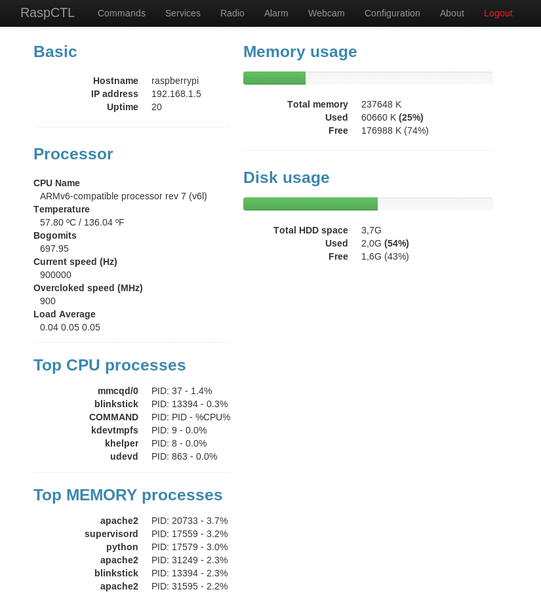
Step 2: Find Your Raspberry Pi’s IP Address
Your Raspberry Pi’s IP address is like its address on the internet. You’ll need this to connect to it remotely. To find the IP address:
- Open the terminal on your Raspberry Pi.
- Type
hostname -Iand press Enter. This will display the IP address.
Step 3: Connect Using SSH
Now that SSH is enabled and you know your Raspberry Pi’s IP address, you can connect to it using an SSH client. Here’s how:
- Open your SSH client (e.g., PuTTY, Terminal).
- Enter the IP address of your Raspberry Pi in the Host field.
- Log in using the default credentials (username: pi, password: raspberry) or your custom credentials.
Using SSH for Remote Access
SSH is the go-to method for controlling a Raspberry Pi remotely, and for good reason. It’s secure, reliable, and easy to set up. But there’s more to SSH than just logging in. Here are a few tips to make the most of SSH:
SSH Tips and Tricks
- Use Key-Based Authentication: Instead of using a password, you can set up SSH keys for more secure and convenient access.
- Set Up SSH Tunnels: SSH tunnels allow you to securely access services running on your Raspberry Pi, like web servers or databases.
- Use SSHFS for File Sharing: If you need to transfer files between your Raspberry Pi and your computer, SSHFS is a great option.
Advanced Methods for Remote Control
Once you’ve mastered the basics of SSH, you can explore some more advanced methods for controlling your Raspberry Pi remotely. Here are a few options:
1. Use a VNC Server
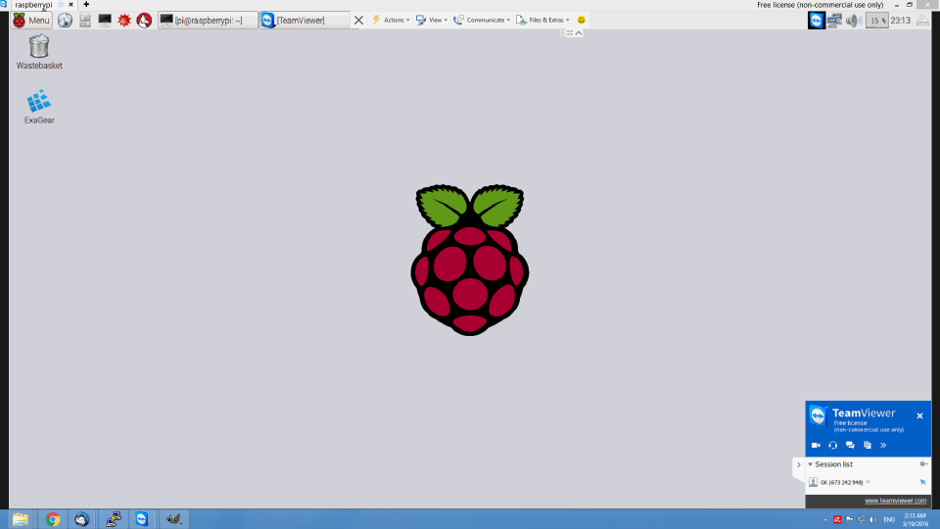
VNC (Virtual Network Computing) allows you to access the graphical desktop environment of your Raspberry Pi remotely. This is especially useful if you’re running applications that require a GUI. To set up VNC:
- Install the VNC Server on your Raspberry Pi by typing
sudo apt install realvnc-vnc-server. - Enable VNC in the Raspberry Pi Configuration tool.
- Download the VNC Viewer app on your computer or mobile device.
- Connect to your Raspberry Pi using its IP address.
2. Use a Cloud-Based Service
If you want to avoid the hassle of setting up port forwarding and dealing with firewalls, you can use a cloud-based service like ngrok or PageKite. These services create a secure tunnel to your Raspberry Pi, allowing you to access it from anywhere without needing to configure your router.
Security Considerations
With great power comes great responsibility, right? When you’re controlling a Raspberry Pi remotely, security should always be a top priority. Here are a few tips to keep your device safe:
- Change Default Credentials: Never use the default username and password for your Raspberry Pi. Change them to something strong and unique.
- Use Strong Passwords: If you’re using password-based authentication, make sure your passwords are strong and complex.
- Enable Firewall Rules: Use a firewall to restrict access to your Raspberry Pi and only allow connections from trusted IP addresses.
- Keep Software Updated: Regularly update your Raspberry Pi’s operating system and software to patch any security vulnerabilities.
Troubleshooting Tips
Even the best-laid plans can go awry sometimes. If you’re having trouble controlling your Raspberry Pi remotely, here are a few troubleshooting tips:
- Check Network Connectivity: Make sure your Raspberry Pi is connected to the internet and has a stable IP address.
- Verify SSH Configuration: Double-check that SSH is enabled and properly configured on your Raspberry Pi.
- Test with a Local Connection: Try connecting to your Raspberry Pi from another device on the same network to rule out any external issues.
- Check Router Settings: If you’re accessing your Raspberry Pi from outside your local network, ensure that port forwarding is set up correctly.
Real-World Applications
Now that you know how to control a Raspberry Pi remotely, let’s talk about some real-world applications. Here are a few ideas to inspire you:
- Home Automation: Use your Raspberry Pi to control smart home devices like lights, thermostats, and security cameras.
- Media Server: Set up a media server to stream movies and music to your devices from anywhere.
- Weather Station: Build a weather station to monitor temperature, humidity, and other environmental conditions.
- Web Hosting: Run a personal website or blog on your Raspberry Pi and access it from anywhere in the world.
Conclusion
Well, there you have it—a comprehensive guide on how to control a Raspberry Pi remotely from anywhere in the world. From enabling SSH to setting up advanced methods like VNC and cloud-based services, we’ve covered everything you need to know to take your Raspberry Pi skills to the next level.
Remember, controlling a Raspberry Pi remotely isn’t just about convenience—it’s about unlocking the full potential of your device. Whether you’re managing a server, automating tasks, or monitoring sensors, remote access gives you the flexibility to interact with your Raspberry Pi from anywhere, anytime.
So what are you waiting for? Grab your Raspberry Pi, follow the steps in this guide,