Connecting to your Raspberry Pi can be one of the most exciting steps in your tech journey. Whether you're a hobbyist or a seasoned developer, this powerful little device opens up endless possibilities. But where do you start? Don’t worry—we’ve got you covered. In this guide, we’ll walk you through everything you need to know about connecting to your Raspberry Pi, from setting up your hardware to troubleshooting common issues.
Imagine this: you’ve just unboxed your shiny new Raspberry Pi, and now you’re ready to dive into the world of coding, IoT projects, and automation. But wait—how exactly do you connect to it? Unlike traditional computers, the Raspberry Pi doesn’t come with a built-in monitor or keyboard. That’s why understanding how to connect to Raspberry Pi is crucial before you start tinkering.
By the end of this article, you’ll not only know how to connect to Raspberry Pi but also how to optimize your setup for seamless performance. So grab your coffee, take a seat, and let’s get started!
Read also:Shynakhatri Hot The Rising Star Taking The World By Storm
Table of Contents
- Introduction to Raspberry Pi
- Hardware Setup: What You’ll Need
- Connecting via SSH
- Using VNC for Remote Access
- Connecting to Raspberry Pi via Wi-Fi
- Ethernet Connection: The Stable Option
- Headless Mode Setup
- Troubleshooting Common Connection Issues
- Advanced Tips for Power Users
- Conclusion: Take Your Raspberry Pi to the Next Level
Introduction to Raspberry Pi
Raspberry Pi has become a household name in the tech world, and for good reason. This tiny computer packs a punch when it comes to functionality and versatility. But before you can unlock its full potential, you need to know how to connect to Raspberry Pi. Think of it like meeting someone new—you gotta introduce yourself first!
One of the coolest things about Raspberry Pi is that it allows you to connect remotely. This means you don’t necessarily need to have a monitor or keyboard plugged into your device. Instead, you can use your laptop or desktop to access it from anywhere in your network—or even across the globe!
So whether you're setting up a home automation system, building a retro gaming console, or experimenting with machine learning, knowing how to connect to Raspberry Pi is the first step toward making your ideas a reality.
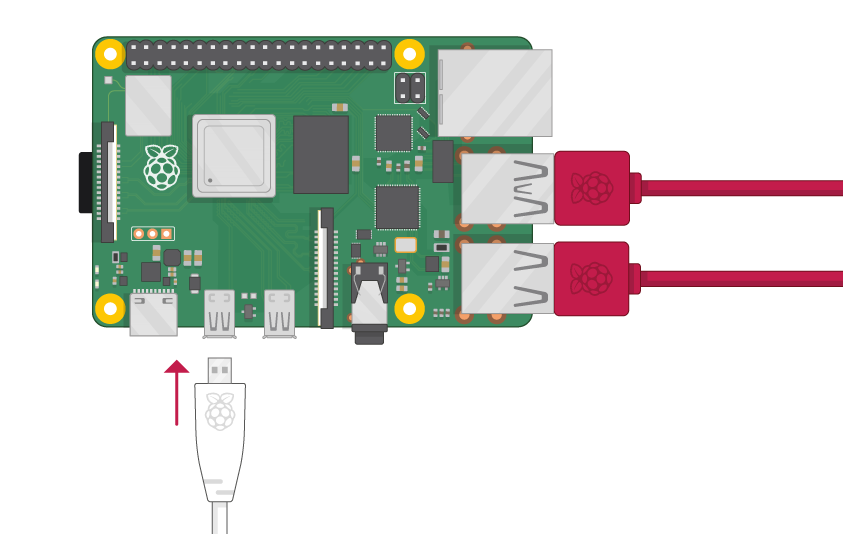
Hardware Setup: What You’ll Need
Alright, let’s talk about the basics. Before you can connect to Raspberry Pi, you’ll need to gather a few essential items. Here’s a quick rundown of what you’ll need:
- Raspberry Pi (any model will do)
- A microSD card preloaded with Raspberry Pi OS
- A power supply compatible with your Raspberry Pi model
- An Ethernet cable (optional but recommended for wired connections)
- A keyboard and mouse (if you’re not using headless mode)
- A monitor or TV with HDMI input (again, optional)
Once you’ve got all these components, you’re ready to move on to the next step. But hey, don’t stress if you don’t have everything—there are ways to connect to Raspberry Pi without a monitor or keyboard, which we’ll cover later.
Why Use Raspberry Pi OS?
Raspberry Pi OS is the official operating system designed specifically for this device. It’s lightweight, easy to use, and packed with features that make connecting to Raspberry Pi a breeze. If you’re new to Raspberry Pi, this is the OS you want to start with.
Read also:Unveiling The Life Of Ocasiocortez Husband A Closer Look At The Man Behind The Power
Oh, and one more thing: make sure your Raspberry Pi OS is up to date. You can update it by running the following commands in the terminal:
sudo apt update && sudo apt upgrade
Connecting via SSH
SSH (Secure Shell) is one of the most popular methods for connecting to Raspberry Pi. It allows you to access your device’s terminal remotely, which is super handy if you’re working on a project that doesn’t require a graphical interface.
Here’s how you can set up SSH:
- Enable SSH on your Raspberry Pi by running the command: sudo raspi-config
- Go to Interfacing Options > SSH > Enable
- Reboot your Raspberry Pi: sudo reboot
- Find your Raspberry Pi’s IP address using the command: hostname -I
- On your computer, open an SSH client (like PuTTY for Windows or Terminal for Mac/Linux)
- Connect to your Raspberry Pi using the IP address and default credentials (username: pi, password: raspberry)
Voila! You’re now connected to your Raspberry Pi via SSH. Easy peasy, right?
Why Use SSH?
SSH is secure, fast, and efficient. It’s perfect for tasks like managing files, running scripts, and configuring settings. Plus, it works seamlessly over both wired and wireless connections.
Using VNC for Remote Access
What if you want to access your Raspberry Pi’s graphical interface remotely? That’s where VNC (Virtual Network Computing) comes in. VNC lets you control your Raspberry Pi as if you were sitting right in front of it.
To set up VNC:
- Enable VNC in raspi-config under Interfacing Options
- Install a VNC client on your computer (like RealVNC Viewer)
- Enter your Raspberry Pi’s IP address and log in with the default credentials
Now you can see your Raspberry Pi’s desktop on your computer screen. Pretty cool, huh?
Advantages of VNC
VNC is ideal for projects that require a GUI, such as media centers or desktop applications. It’s also great for troubleshooting issues that might be easier to fix visually.
Connecting to Raspberry Pi via Wi-Fi
Let’s face it—wires can be a hassle. That’s why many users prefer connecting to Raspberry Pi via Wi-Fi. Not only does it declutter your workspace, but it also gives you more flexibility in terms of placement.
To connect to Wi-Fi:
- Open the terminal and type: sudo nano /etc/wpa_supplicant/wpa_supplicant.conf
- Add the following lines, replacing "network_name" and "password" with your Wi-Fi details:
network={
ssid="network_name"
psk="password"
}
- Save and exit the file (Ctrl + X, then Y)
- Reboot your Raspberry Pi: sudo reboot
Boom! Your Raspberry Pi is now connected to Wi-Fi. Just remember to double-check your network settings if you’re having trouble connecting.
Tips for a Strong Wi-Fi Connection
Wi-Fi performance can vary depending on factors like distance, interference, and signal strength. To ensure a stable connection:
- Place your Raspberry Pi close to your router
- Use a 5GHz band if your router supports it
- Consider using a Wi-Fi adapter with external antennas
Ethernet Connection: The Stable Option
While Wi-Fi is convenient, Ethernet is the way to go if you want a rock-solid connection. It’s faster, more reliable, and less prone to interference. Plus, it’s super easy to set up—just plug in an Ethernet cable, and you’re good to go.
One thing to keep in mind: some Raspberry Pi models, like the Pi Zero W, don’t have an Ethernet port. In that case, you’ll need a USB-to-Ethernet adapter.
Why Choose Ethernet?
Ethernet is ideal for data-intensive tasks like file transfers, media streaming, and server hosting. If your project requires high bandwidth and low latency, Ethernet is the way to go.
Headless Mode Setup
Headless mode is perfect for when you don’t have a monitor or keyboard handy. With this setup, you can connect to Raspberry Pi remotely right out of the box.
Here’s how:
- Download Raspberry Pi Imager and install Raspberry Pi OS Lite
- Create an empty file named ssh in the root directory of your microSD card
- Create a file named wpa_supplicant.conf with your Wi-Fi details (same as above)
- Insert the microSD card into your Raspberry Pi and power it on
- Use an SSH client to connect to your Raspberry Pi
And just like that, you’ve got a headless Raspberry Pi setup. No monitor, no keyboard—just pure remote access goodness.
Benefits of Headless Mode
Headless mode saves space, reduces clutter, and makes your Raspberry Pi portable. It’s perfect for IoT projects, embedded systems, and any application where a physical interface isn’t necessary.
Troubleshooting Common Connection Issues
Even the best-laid plans can go awry sometimes. If you’re having trouble connecting to Raspberry Pi, here are a few common issues and how to fix them:
- Can’t find your Raspberry Pi’s IP address: Try using a network scanner app like Fing or Angry IP Scanner.
- SSH not working: Make sure SSH is enabled in raspi-config and that your firewall isn’t blocking the connection.
- Wi-Fi connection unstable: Check your router settings and consider switching to Ethernet if possible.
- VNC not connecting: Ensure VNC is enabled and that your client software is up to date.
Still stuck? Don’t hesitate to reach out to the Raspberry Pi community forums or check out the official documentation for more help.
Advanced Tips for Power Users
Once you’ve mastered the basics, it’s time to level up your Raspberry Pi skills. Here are a few advanced tips to take your setup to the next level:
- Set up a static IP address: This ensures your Raspberry Pi always has the same address, making it easier to connect.
- Enable two-factor authentication: Add an extra layer of security to your SSH connections.
- Use a reverse SSH tunnel: Access your Raspberry Pi from anywhere in the world, even behind firewalls.
- Automate tasks with cron jobs: Schedule scripts and commands to run at specific times.
These tips may sound intimidating, but with a little practice, you’ll be a Raspberry Pi pro in no time.
Conclusion: Take Your Raspberry Pi to the Next Level
Connecting to Raspberry Pi doesn’t have to be complicated. With the right tools and a bit of know-how, you can unlock its full potential and bring your ideas to life. Whether you’re using SSH, VNC, Wi-Fi, or Ethernet, there’s a method that suits your needs.
So what are you waiting for? Grab your Raspberry Pi, follow this guide, and start exploring the endless possibilities. And don’t forget to share your projects with the community—we’d love to see what you create!
Got questions? Leave a comment below, and we’ll do our best to help you out. Happy tinkering!